
Chat With Us
We offer 24-hour chat support


Welcome to our comprehensive guide on mold making! Whether you're a beginner or an experienced mold maker, this guide will provide you with all the information you need to create high-quality molds from start to finish. In this section, we'll explore the step-by-step process of mold making, so you can get started on your next project with confidence.
Before we dive into the details of mold making, it's important to note that the process can vary depending on the materials and techniques used. However, the general steps outlined in this guide should apply to most mold making projects.
A hand pouring liquid silicone into a container of clay with a small object partially submerged in it. Another hand holding a wooden stick stirring the mixture, with droplets of silicone spilling over the edges of the container. A close-up shot of the finished mold, where the silicone has hardened around the object and the clay has been removed.
Before delving into the steps of mold making, it's essential to understand the different mold making techniques available. Each technique has its unique benefits and drawbacks, so you must choose one that best suits your project's needs.
Silicone mold making is a popular technique that involves making a mold from a silicone rubber material. This process produces molds that are flexible, heat-resistant, and long-lasting. Silicone molds are ideal for creating detailed replicas of original objects, making them perfect for casting figurines and other intricate designs.
Plaster casting technique is an excellent option for creating molds for larger objects. This technique involves pouring plaster material over the original object, allowing it to dry and then removing the plaster mold. Plaster molds are ideal for creating casts of objects such as statues, columns, and other architectural details.
Reusable mold making involves creating a mold from a variety of materials, such as silicone or polyurethane, that can be reused multiple times. This technique is ideal for artists and craftsmen who need to create multiple copies of the same object. Reusable molds are cost-effective and produce high-quality replicas of the original object.
Pro Tip: Choose a mold making technique that best suits your project's needs. Consider factors such as the size and complexity of the object, the desired finish, and the number of copies required.
Before starting the mold making process, it's crucial to gather all the necessary materials. This section will guide you through the essential tools and materials required for mold making.
| Materials | Description |
| Original Object | Your original object is the item you wish to replicate with your mold. It could be made of plasticine or silicone rubber, depending on what material you want to use for your mold. |
| Modeling Clay | This clay will be used to create a base for your original object. It's best to use non-sulfur based clay to avoid any chemical reactions with the mold material. |
| Silicone Rubber |
This is one of the most popular materials for making molds. Silicone rubber comes in two parts, and when they are mixed together, it creates a durable and flexible mold. |
| Release Agent | A release agent is used to prevent the mold material from sticking to the original object. There are different types of release agents available, depending on the type of mold material you're using. |
| Measuring Scale | It's important to have an accurate measuring scale to ensure the right ratios of mold material are mixed. |
| Mixing Cups and Stirring Sticks | These are used for mixing the mold material together properly. |
| Paintbrushes | You'll need paintbrushes for applying release agents and for painting the mold material onto your original object. |
There are other materials that you may need, depending on the mold making technique you choose. For example, if you're making a plaster cast, you may need plaster bandages and a plaster mix.
Now that you know about the essential materials and tools for mold making, you're one step closer to creating your own molds. In the next section, we'll explore how to prepare your work area for a successful mold making project.
If you're planning to make molds, it's essential to prepare your work area properly. A clean and organized workspace will help ensure the success of your DIY mold making project.
Step 1: Choose the Right Area
When selecting a work area, choose a space that is well-ventilated, away from food and drink, and that is easy to clean up. Avoid areas with carpeting or upholstered furniture, as the mold making materials can be messy and difficult to clean up.
Step 2: Gather Tools and Supplies
Before you start your mold making project, gather all the necessary tools and supplies. This includes:
| Tools | Supplies |
| Gloves | Mold Release Agent |
| Safety Glasses | Mold Making Material |
| Respirator | Measuring Cups |
| Mixing Sticks |
Plastic Containers |
Step 3: Set Up Your Work Area
Once you have gathered your tools and supplies, it's time to set up your work area. Here are some key steps to follow:
By following these simple steps, you can create a safe and organized workspace for your DIY mold making project. Now that you're prepared, it's time to move on to the next step – creating a prototype.
Before you begin making a mold, you need a prototype or original object to replicate. This can be anything from a figurine, a piece of jewellery or any other object you want to reproduce. Whatever the object is, it's important that it is in good condition with no cracks or imperfections, as these will be transferred to the mold.
To create a prototype, you can use a variety of materials such as clay, wax, or even 3D printing. When creating your prototype, ensure that it has the same dimensions as the final product you want to achieve. Using a caliper or ruler to measure will help ensure that your prototype is accurate.
Pro tip: If your object has intricate details or undercuts, you may need to create a two-part mold. We'll cover this technique in section 9: "Making Multiple Piece Molds".
Expert Tip: The quality of your prototype will determine the quality of your mold. Take your time and ensure that your prototype is as close to perfect as possible before moving on to the next step.
In this section of our mold making tutorial, we'll discuss the importance of using a mold release agent. Mold release agents are essential for easy and safe demolding, preventing damage to the mold or the object inside. A mold release agent creates a barrier between the mold and the object, allowing for easy separation.
Before applying the mold release agent, ensure your mold is clean and dry. Any debris or moisture can affect the quality of the mold release, resulting in incomplete coverage or uneven demolding.
There are different types of mold release agents available, including aerosol sprays, liquid solutions, and paste waxes. Each has its advantages and disadvantages, depending on the material and complexity of the mold.
When applying the mold release agent, it's important to follow the manufacturer's instructions carefully. Some release agents require multiple coats, while others need to dry before use. Ensure the entire mold surface is covered in a thin, even layer, with no excess or missed spots.
Tip: Avoid over-application of the mold release agent, as it can cause air bubbles or other defects in the final mold.
Once the mold release agent has been applied, allow it to dry completely before pouring the mold material. This can take anywhere from a few minutes to several hours, depending on the type of release agent used. Follow the manufacturer's recommended drying time for best results.
With the mold release agent properly applied, your mold is now ready for pouring.
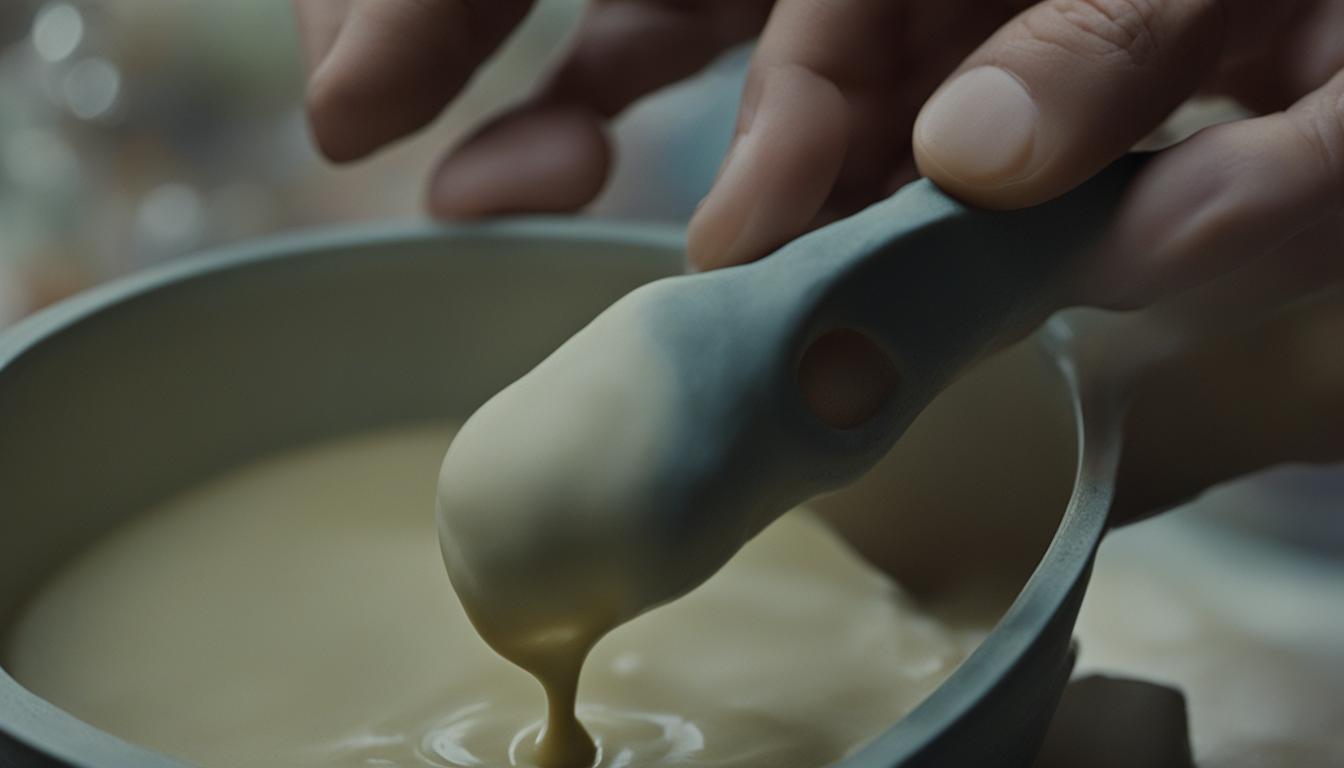
Once you have your prototype and mold release agent, it's time to mix and pour the mold material. This step is crucial to create a high-quality and durable mold for your project. Here are the steps you need to follow:
1. Calculate the amount of mold material you'll need. Use a measuring cup to ensure accuracy.
2. Mix the mold material according to the manufacturer's instructions. Make sure to wear gloves and a mask to protect yourself from any harmful fumes.
3. Stir the mixture thoroughly to ensure there are no lumps or inconsistencies in the material.
4. Pour the mold material into the mold container. Be careful not to pour too quickly, as this can cause air bubbles to form in the mold.
5. If your mold requires multiple pieces, allow the first layer to cure for at least an hour before applying the next layer.
It's important to pay close attention to the mixing and pouring process to ensure a smooth and even mold surface. Any inconsistencies can affect the quality of your final product.
Here are some additional tips to help you achieve the best results:
By following these steps, you'll be able to create a high-quality mold for your project. In the next section, we'll discuss the curing and demolding process to complete your mold making journey.
After pouring the mold material, the next step in the mold making tutorial is curing the mold. It is a crucial stage of the process where the mold material hardens and sets. The time it takes for the mold to cure depends on the type of mold material and the size of the mold.
Once the mold is cured, it's time to demold. The demolding process involves separating the mold from the prototype. This step requires careful attention to avoid damaging the mold or the prototype. Follow these steps for demolding:
1. Remove the mold from the mold box. If you are using a two-part mold, gently remove the mold box walls.
2. Separate the mold from the prototype. Use a sharp blade or a pair of scissors to cut any excess material from the mold. Be careful not to damage the mold or the prototype.
3. Clean the mold. Use warm water and soap to clean the mold. Use a soft-bristled brush to remove any debris or leftover mold material.
Now that the mold is demolded, it's ready for use!
Creating multiple piece molds can be a challenging task, but with the right techniques, it can be a rewarding experience. Here are some tips to help you make the most out of your multiple piece molds:
Here's an example of how registration keys can be used to create a multiple piece mold:
| Mold Piece | Registration Key | Corresponding Key |
| Top Half | ||
| Bottom Half |
In this example, the registration key on the top half of the mold corresponds with the corresponding key on the bottom half of the mold, ensuring a proper fit. Keep these tips in mind when creating multiple piece molds, and you'll be well on your way to achieving professional results.
Once the mold is demolded, it's important to clean and finish it to ensure optimal results for your casting. Here's what you need to do:
Remember, always follow the manufacturer's instructions for cleaning and finishing your specific mold to ensure the best results.
Now that your mold is cleaned and finished, you're ready to start casting! Check out Section 11 for step-by-step instructions on using your mold to create casts.
Now that you have your mold, it's time to start casting! Follow these step-by-step instructions to ensure a successful casting process.
Selecting the Right Material
Before casting, you need to select the right material for your project. Silicone and plaster are popular choices, but there are many other materials to choose from. Consider factors such as durability, flexibility, and detail reproduction when selecting your material.
Preparing the Mold
Prior to casting, it's important to prepare the mold properly. Use a release agent to ensure easy removal of the casting material. Additionally, check for any imperfections or air bubbles in the mold and fill them in with putty or clay.
Mixing the Casting Material
Follow the manufacturer's instructions to mix the casting material. This may involve adding water or other chemicals to the powder or liquid base. Use a mixing container and spatula to ensure a consistent mixture.
Pouring the Casting Material into the Mold
Slowly pour the casting material into the mold. Take care not to overfill the mold, as this can result in excess material or air bubbles. Use a vibrating tool to remove any air bubbles and ensure the material fills all corners and crevices of the mold.
Demolding and Finishing
Once the casting material has cured, it's time to remove the cast from the mold. Gently remove the cast, taking care not to damage the mold. Use a knife or sandpaper to remove any excess material or imperfections from the cast.
With these steps, you can successfully cast with your mold. Remember to choose the right material, prepare the mold properly, and take care when pouring and demolding the cast. Happy casting!
In conclusion, creating molds can seem like a daunting process, but with this step-by-step guide, you can tackle your mold-making projects with confidence.
Whether you're looking to make custom jewelry, replicate a sculpture, or create unique home decor, mold making opens up a world of possibilities.
Start Small and Build Your Skills
If you're new to mold making, start with simple projects and build your skills over time. With practice, you'll soon be able to create intricate molds with ease.
Don't Be Afraid to Experiment
Mold making is a versatile and adaptable art form, so don't be afraid to experiment with different techniques and materials. You never know what amazing creations you might come up with!
So what are you waiting for? Grab your materials, prepare your work area, and start creating molds today. Who knows what incredible things you might make!
How long does it take for a mold to cure?
The curing time for a mold can vary depending on the type of mold material used. In general, it can take anywhere from a few hours to several days for the mold to fully cure and harden.
What is a mold release agent and why is it important?
A mold release agent is a substance applied to the mold surface before pouring the mold material. It helps prevent the mold material from sticking to the original object and allows for easy removal of the finished mold.
Can I reuse a mold?
Yes, depending on the type of mold material used, molds can often be reused multiple times. However, it's important to properly clean and maintain the mold to ensure optimal results with each use.
Can I use household items for mold making?
While some household items may work for certain types of molds, it's generally recommended to use specialized mold making materials for best results. Household items may not provide the necessary strength and durability needed for complex molds.
Are there any safety precautions I should take when making molds?
Yes, it's important to follow safety guidelines when working with mold making materials. This includes wearing protective gloves, goggles, and working in a well-ventilated area to avoid inhaling any fumes. Always read and follow the instructions provided with the mold making materials.
Can I make molds of delicate objects?
Yes, it is possible to make molds of delicate objects. However, extra care should be taken to ensure the object is not damaged during the mold making process. Consider using a soft brush or gentle handling techniques when applying the mold material.
How do I know if my mold is properly mixed?
To ensure your mold is properly mixed, thoroughly combine the mold material according to the manufacturer's instructions. Look for a consistent color and texture throughout the mixture. Avoid any streaks or clumps that could impact the quality of the mold.
How do I prevent air bubbles in my mold?
To prevent air bubbles in your mold, slowly pour the mold material into the mold container and gently tap or vibrate the container to release any trapped air bubbles. You can also use a mold release agent specifically designed to reduce air bubble formation.
Leave a comment