
Chat With Us
We offer 24-hour chat support

For many, mold making can seem a bit intimidating. Molds are used when you wish to create copies of an original model or a cast that you have made. This step-by-step, ‘How-to’ explanation will demonstrate just how easy it is to create molds that reproduce just about anything . . . and it is fun, too!
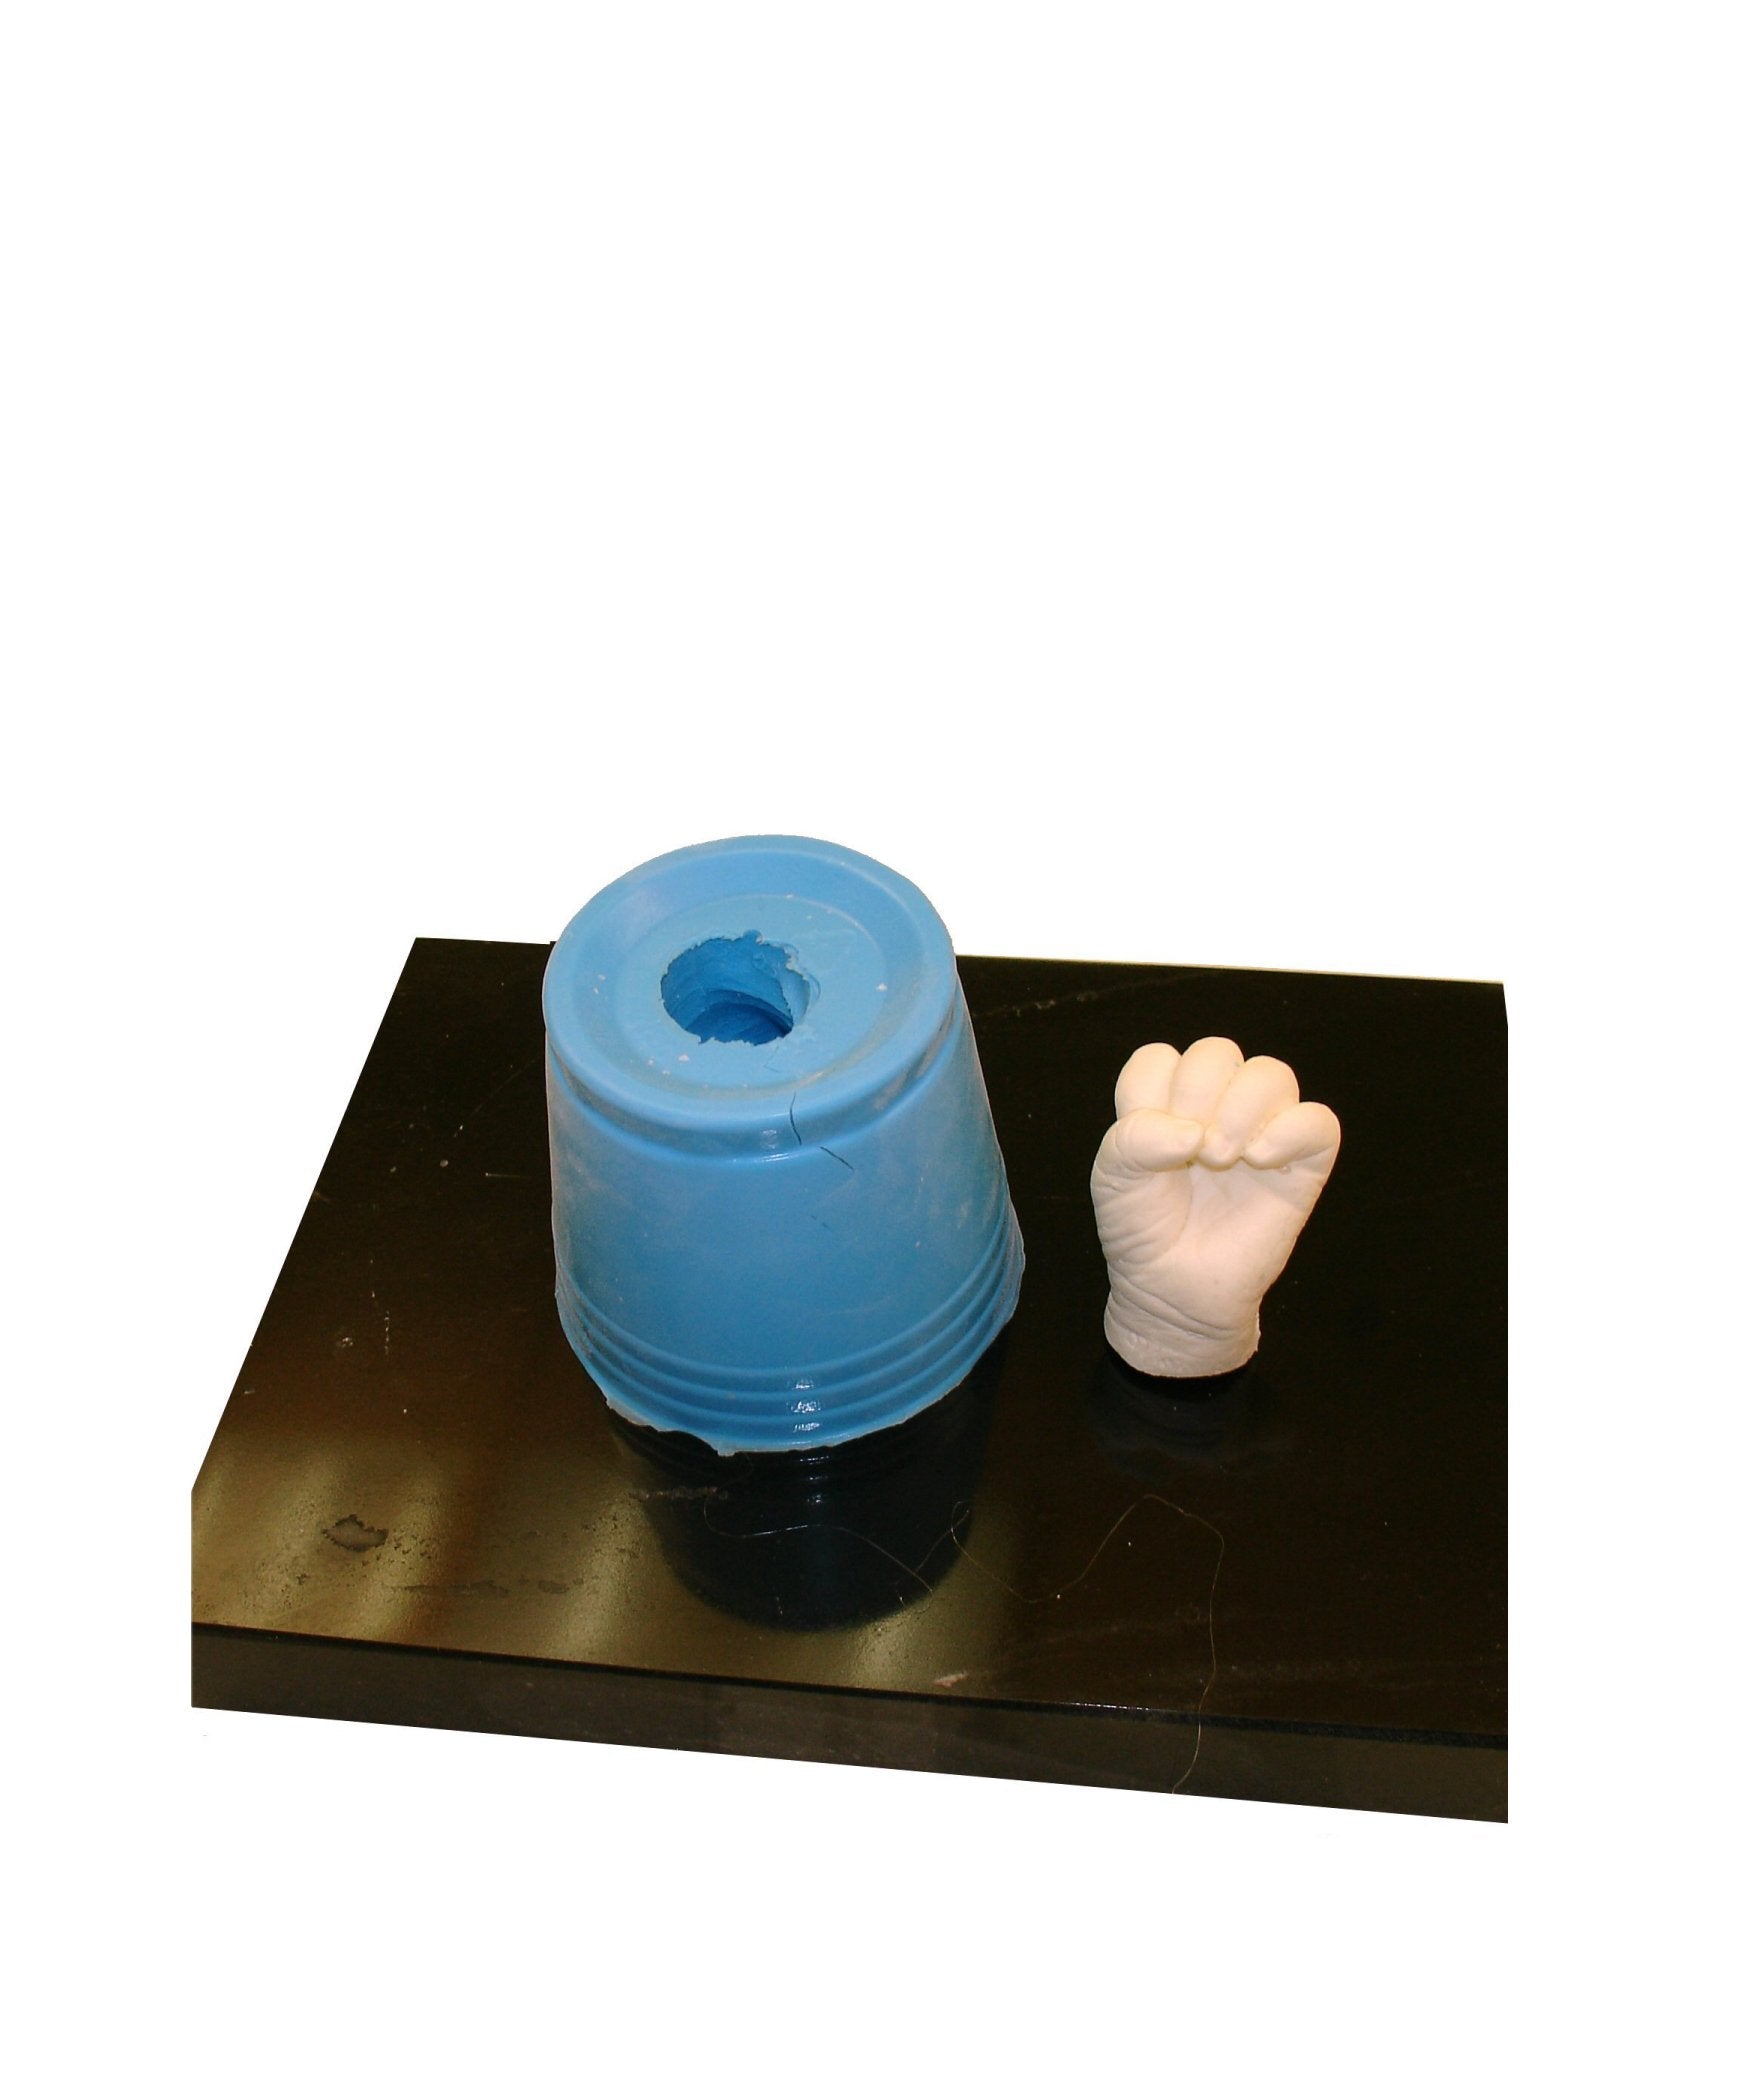
There are two basic mold types, a blanket mold, and a block mold. A block mold is the simplest form of mold. It is a one-part poured mold. It can be used to reproduce figurines, small statues, and uncomplicated models. In our demonstration we have chosen to reproduce a baby’s hand that we cast earlier in alginate and casting plaster. With such a mold you can make numerous copies of your model using casting plaster such as CastRite casting stone or a two-part polyurethane resin such as KastEZ Resin.
For this project you’ll need about 30 minutes of preparation, then several hours for the mold to cure before you de-mold. The materials and tools required are minimal. So, let’s get started.
Of course, you need a model to copy. In this demonstration it is our baby’s hand cast.
Assemble your materials.
1 –Pint two-part RTV silicone. We are using MoldRite 25
A box cutter or an Exacto knife,
Craft sticks
Hot glue gun,
Several 16-Oz plastic cups
A gram scale,
Using your knife, remove the top portion of the cup and discard it as we don’t need such a deep container. This allows the mold maker easier access to the inside of the cup so that the model can be placed on the bottom.
Hot glue is applied to the bottom of the model. The model is then inserted into the cup and glued to its bottom. This prevents the model from moving when the mold material is poured into the cup.
The little hand is centered and glued on the bottom of the cup. You should have at least one inch of space all around your model to give it adequate support once de-molded.
The silicone is then measured. Since our silicone is a two-part, with a 10:1 mix ratio, we weigh out 10 parts of Part A (base) using our gram scale. You can estimate the amount of Part A just knowing you need enough to cover the highest part of your model by at least 1-inch.
In this case the precise weight being 285 grams of Part A, we need to weigh out 10% of the Part A amount of Part B (the catalyst). Therefore, we will weigh out 28.5 grams of Part B, in a separate clean cup. When portioned out, both components are combined in a third cup.
Mix the two components thoroughly, scraping the sides and the bottom. You know you have mixed long enough when the material is an even shade of blue throughout – without any marbling or streaking. Mixing takes about a minute.
Be careful you do not create air bubbles. If you don’t use a vacuum chamber to de-air, then pour a high, narrow stream of silicone rubber, with the pour remaining in one position. This method minimizes air bubbles. As air can escape from the narrow stream during the pouring process.
Stop pouring when you cover the top of the model with at least one inch of silicone.
The silicone will cure enough to de-mold in about 2-hours. But first, test for firmness with a craft stick. The surface should be firm and not sticky. If it is, wait a bit longer before attempting to de-mold.
To remove the model from the cured rubber, simply slit the side of the cup to slide out the finished mold. Then, using a sharp knife, cut a sawtooth pattern in one side of the mold to remove the model. The sawtooth pattern allows the mold to register when it is closed again for the casting step.
Spread the halves of the mold and slowly extract the model, using a back and forth rocking motion.
Your mold is now ready to be cast. Clean out mold of any particles and close it up using a rubber band to hold it shut.
Mix the casting material according to the label directions and pour it into your mold. Leave it undisturbed while the casting material sets. When cured, remove the rubber band, open the mold, and carefully remove your new casting. It may be necessary to clean it up. Use some sandpaper to remove any flashing or rough edges.
That is all there is to making a one-piece block mold. The materials described here are available on line or at better art stores everywhere.
Leave a comment