
Chat With Us
We offer 24-hour chat support


Life casting with plaster bandages is a rewarding art form that captures the exact shape and texture of the human body, creating lasting three-dimensional memories. Whether you're looking to preserve your child's tiny hands, create artistic body sculptures, or craft unique decorative pieces, this comprehensive guide will walk you through everything you need to know to create beautiful, detailed casts safely and effectively.
As a beginner-friendly technique, plaster bandage casting requires minimal specialized equipment while offering impressive results. Let's dive into this creative process that transforms ordinary moments into extraordinary keepsakes.
Before beginning your life casting journey, gathering the right supplies ensures a smooth process and beautiful results. Here's everything you'll need:

Get all the supplies you need in one convenient package. Our beginner's kit includes premium plaster bandages, release agent, and essential tools.
Shop Life Casting KitsAlways use a skin-safe release agent before applying plaster bandages. Never apply plaster directly to skin or hair, as it can cause irritation, burns, or become painfully stuck. Test materials on a small area first if you have sensitive skin.
Proper preparation is crucial for a successful life casting experience. Follow these steps before applying any materials:
Choose a comfortable area with good ventilation and access to water. Cover all surfaces with plastic sheeting or drop cloths, as plaster can be messy. Arrange your materials within easy reach and prepare bowls of warm water (80-90°F) for dipping the bandages.
For optimal results, maintain a comfortable room temperature between 68-75°F. Extreme temperatures can affect setting times and comfort for your model.
Have your subject wear old clothes or cover them with a plastic cape. Explain the process thoroughly so they know what to expect. For areas with hair, apply a generous layer of petroleum jelly or specialized release cream to prevent the plaster from sticking.
Position your model in a comfortable pose they can maintain for 15-20 minutes without moving. Use pillows or supports if necessary to help maintain the position.

Follow this detailed process to create your life cast. We'll break it down into manageable steps that ensure success even for first-time casters.
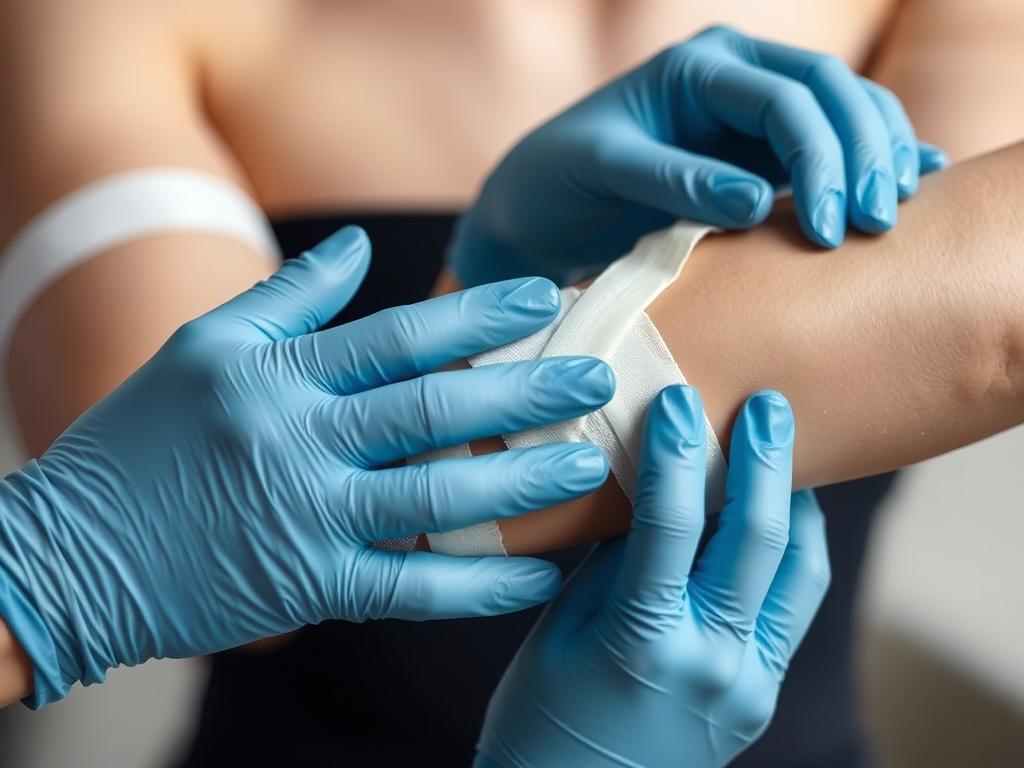
Begin by thoroughly applying your release agent (petroleum jelly or specialized release cream such as MoldEZ) to the area being cast. Pay special attention to body hair, eyebrows, and hairlines. The release agent should form a thin but complete barrier between the skin and plaster.

"The most common mistake beginners make is skimping on release agent. Be generous - it's much easier to apply extra than to deal with plaster stuck to hair."
Step 2: Prepare and Apply Plaster Bandages
Cut your plaster bandages into manageable strips (4-6 inches long). Dip each strip into warm water for 2-3 seconds until bubbles stop forming. Gently run the strip between your fingers to remove excess water without squeezing out the plaster.
Apply the first layer of bandages, overlapping each strip by about 50%. Work quickly but carefully, smoothing as you go to eliminate air bubbles. For most projects, 3-4 layers provides adequate strength.
Pro Tip: For areas with complex contours like fingers or facial features, use smaller strips to ensure the bandages conform properly to the shape.
The plaster bandages will begin to set within 5-8 minutes, becoming warm and firm to the touch. Allow 15-20 minutes total for proper curing before attempting removal. The cast is ready when it feels completely firm and the warmth has subsided.
During this time, ensure your model remains still. Light conversation can help pass the time and keep them comfortable. Remind them that the warming sensation is normal as the plaster cures.
Once fully cured, gently work your fingers around the edges of the cast to break the seal. Have your model relax the cast area while you slowly and carefully remove the mold. For complex shapes, you may need to cut a removal line with scissors.
If you encounter resistance, apply more petroleum jelly around the edges and continue working slowly. Never force removal, as this can damage both the cast and potentially hurt your model.
If you plan to create a positive cast from your mold, allow the plaster bandage mold to dry completely (24 hours is ideal). Once dry, apply a thin layer of petroleum jelly or soap solution as a release agent inside the mold.
You can then pour your casting material (plaster, resin, etc.) into the mold and allow it to set according to the material's instructions. After curing, carefully remove the outer bandage mold to reveal your finished cast.

Here are three practical examples with specific measurements to help you plan your own projects:

Materials Used:
Perfect for beginners, this small project captures a child's hand in a waving or flat position. The limited surface area makes it manageable while still creating a meaningful keepsake.
Materials Used:
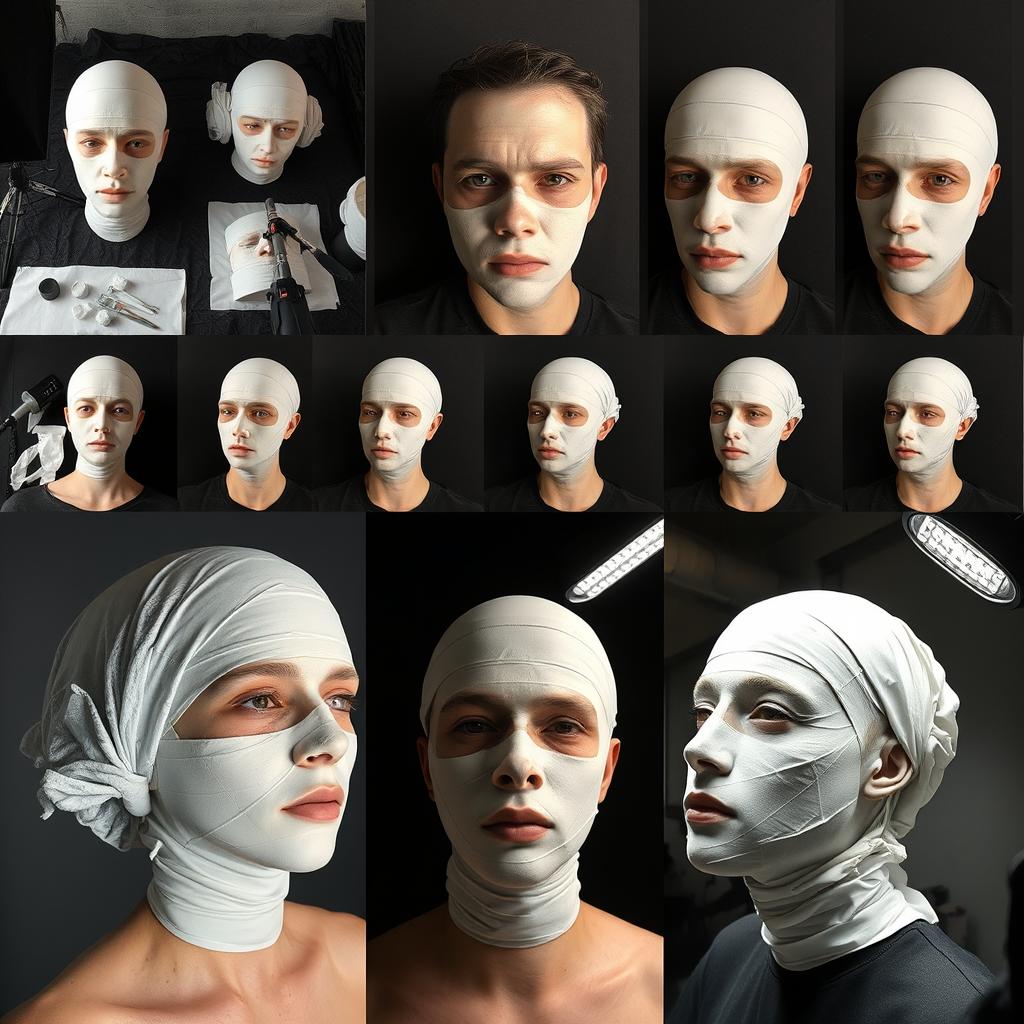
Face casting requires careful timing and preparation. This 15-minute workflow ensures your model remains comfortable while capturing detailed facial features. Always leave nostrils clear for breathing.

Materials Used:
A full torso cast is an advanced project requiring significant materials and assistance. This estimate covers a front torso from neck to waist, creating a dramatic sculptural piece.
Safety should always be your top priority when creating life casts. Follow these essential precautions:

Once your cast has fully dried (24-48 hours for larger pieces), you can transform it into a beautiful finished piece with these techniques:
Start with medium-grit sandpaper (120-150) to remove major imperfections, then progress to finer grits (220-320) for a smooth finish. Sand in circular motions, being careful not to apply too much pressure. Wipe away dust frequently with a slightly damp cloth.
For hard-to-reach areas, use small pieces of sandpaper wrapped around a pencil or dowel. Take your time with this step—it creates the foundation for all further finishing.
Before painting, apply a thin layer of gesso or primer to create a smooth, receptive surface. Acrylic paints work best on plaster, offering vibrant colors and easy cleanup. Consider these approaches:
To protect your finished piece, apply a clear sealer. Options include:
Apply 2-3 thin coats rather than one thick coat, allowing proper drying time between applications. This ensures even coverage and prevents drips or bubbles.
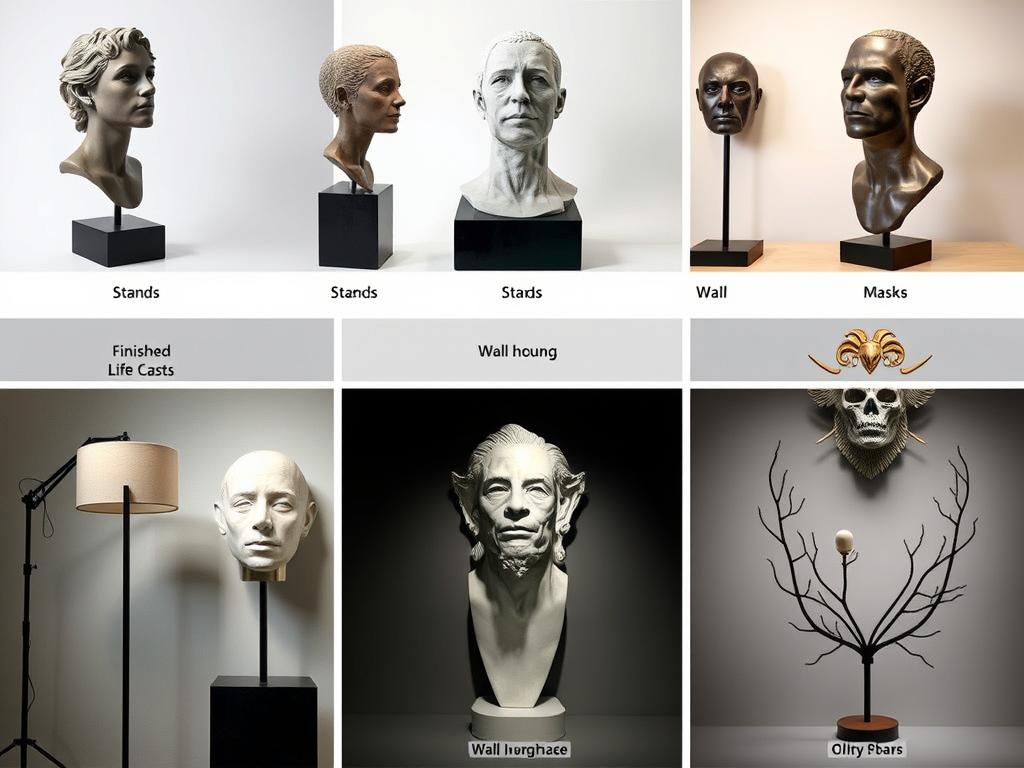
Consider these creative ways to display your finished life casts:
Life casting offers endless creative possibilities. Here are some popular applications to inspire your projects:
Preserve those tiny fingers and toes that grow so quickly. Create individual casts or combine hands and feet in creative arrangements. Add birth details, names, or dates for personalized keepsakes that families will treasure for generations.
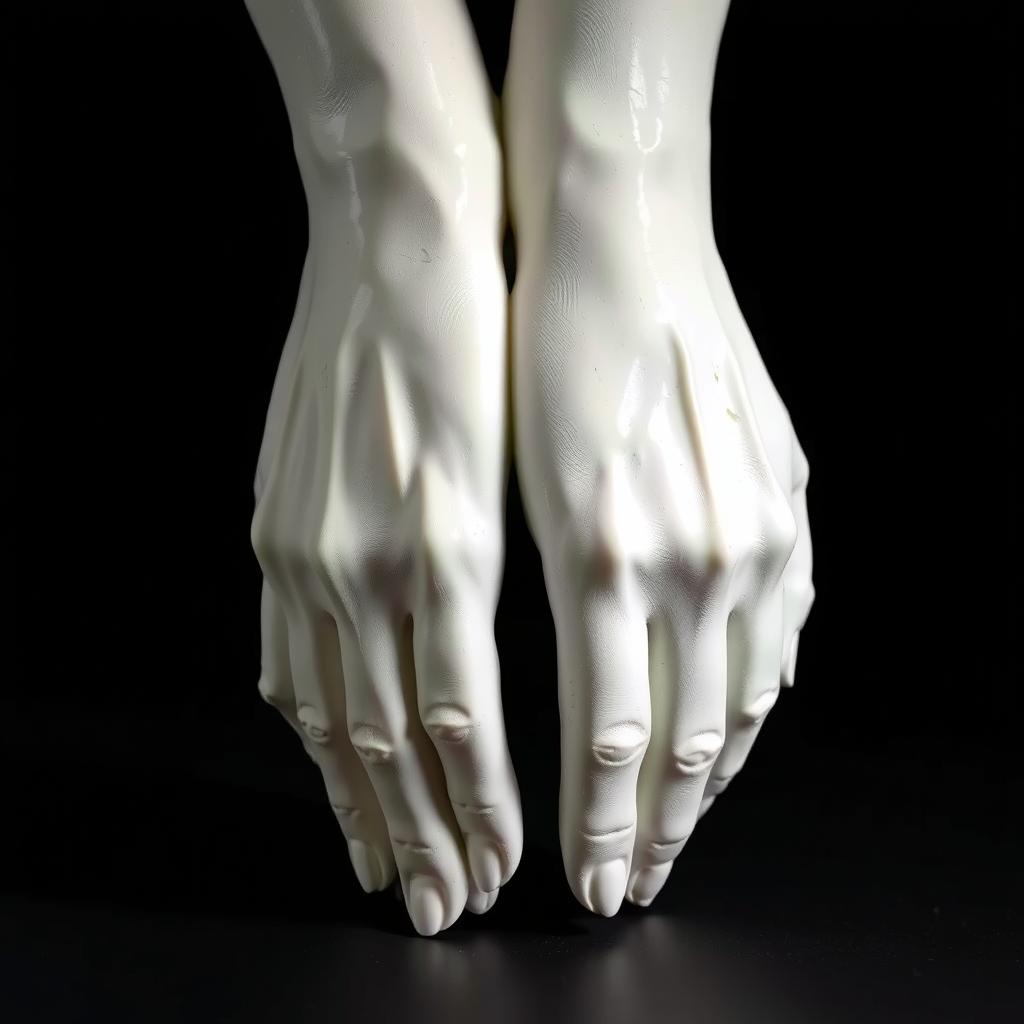
Capture the intimate connection between partners with intertwined or clasped hands. These make meaningful anniversary gifts, wedding mementos, or relationship milestones. Consider adding wedding dates or meaningful quotes to the finished piece.
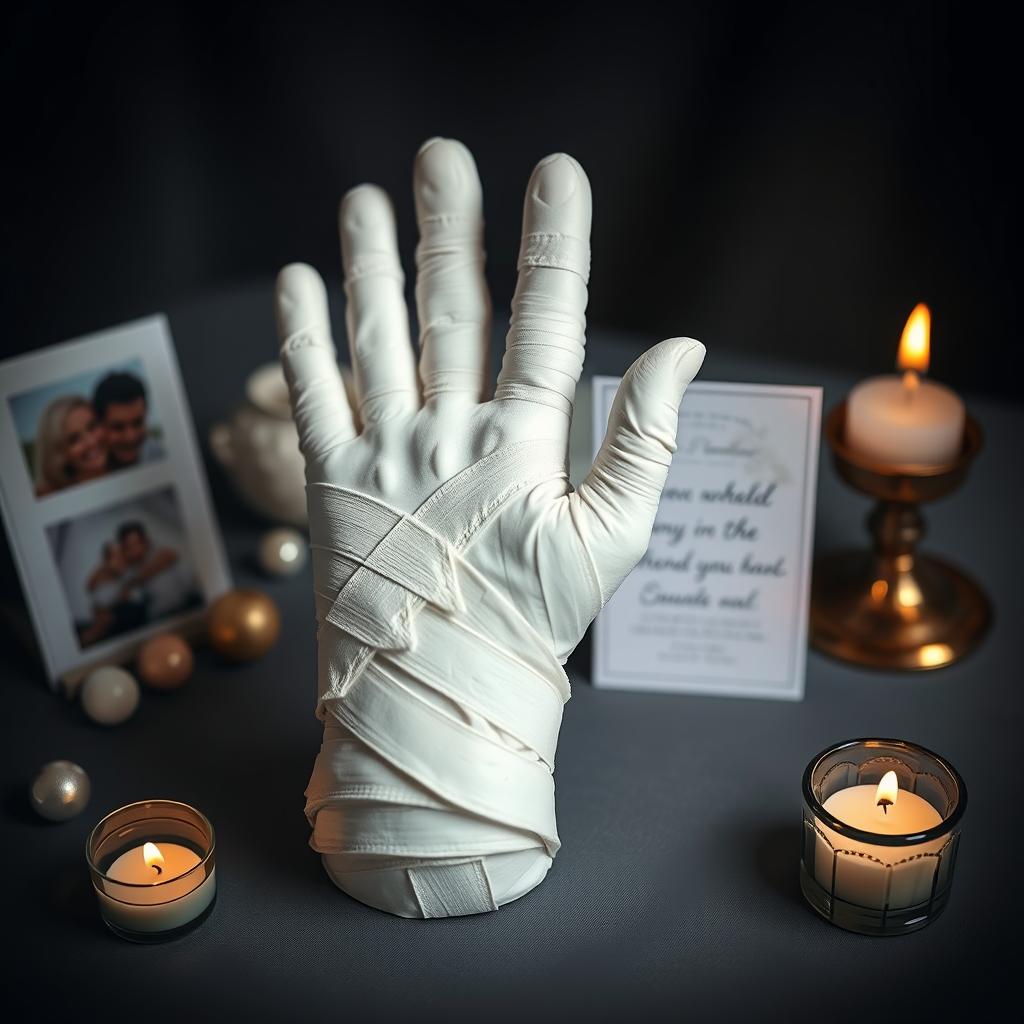
Create lasting memories of loved ones with hand or face casts that preserve their unique features. These pieces provide tangible connections and comfort during the grieving process. Many families incorporate these into memorial displays with photos and meaningful objects.
Ready to preserve special moments with life casting? Our complete kits include everything you need to get started.
Even experienced artists encounter challenges. Here are solutions to common issues:
Air bubbles typically occur when bandages aren't smoothed properly during application. To prevent them:
Several factors can affect drying time:
To speed drying, place the cast in a warm, dry area with good air circulation.
For capturing intricate details:
If your cast is sticking during removal:
To repair cracks in dried plaster casts:
Yes, for complex shapes like a full face or torso:
Life casting with plaster bandages offers a unique way to preserve special moments and create meaningful art. As you've seen throughout this guide, the process is accessible to beginners while offering endless creative possibilities as your skills develop.
Remember that practice makes perfect—consider starting with smaller projects like hand casts before moving on to more complex forms. Each project will build your confidence and technique, leading to increasingly impressive results.
The memories you capture through life casting become treasured keepsakes that preserve fleeting moments in three-dimensional form. Whether creating gifts for loved ones or artistic pieces for display, your life casts tell stories that photos simply cannot.
Get everything you need to create beautiful, detailed life casts with our premium supplies and kits.
Shop Life Casting Instructional DVDs
Leave a comment