
Chat With Us
We offer 24-hour chat support


A 400 year old plaster finishing technique proves milk builds more than strong bones.
There are many ways to finish plaster surfaces, from paint, wax encaustic and tempera, to glues, glitter and maybe even feathers if that tickles you. Some are certainly more unique and artistic than others, but I find the old adage, “simple is better,” true more often than not.
Several years ago I received a call from a customer who wished to discuss a variety of alternatives to finish a torso life casting they had just completed in plaster. We talked about various standard finishing techniques, including a great faux bronze finishing method we did in the studio. But none of the options seemed to have appealed to the caller, until I mentioned milk. Then he was very curious.
Actually the use of milk as a method of applying finishes can be traced back several thousands of years or so when early artisans began experimenting with ways to apply color to their drawings and murals. Actually, even before written history, many ancient cave wall drawings were found to consist of a milk carrier. These early users also found milk paint to have protective properties that would add durability to painted surfaces giving them a rich patina and a seeming internal glow.
I had remembered a 400 year old book I had read on the subject of art techniques written then for the renaissance artist. It surprised me to read it as it seemed implausible. The author described applying raw whole milk to plaster surfaces as a base coat. It certainly seemed like an absurd idea as I remember the awful smell of sour milk in my floor mats from an accidental spill in my car the previous summer.
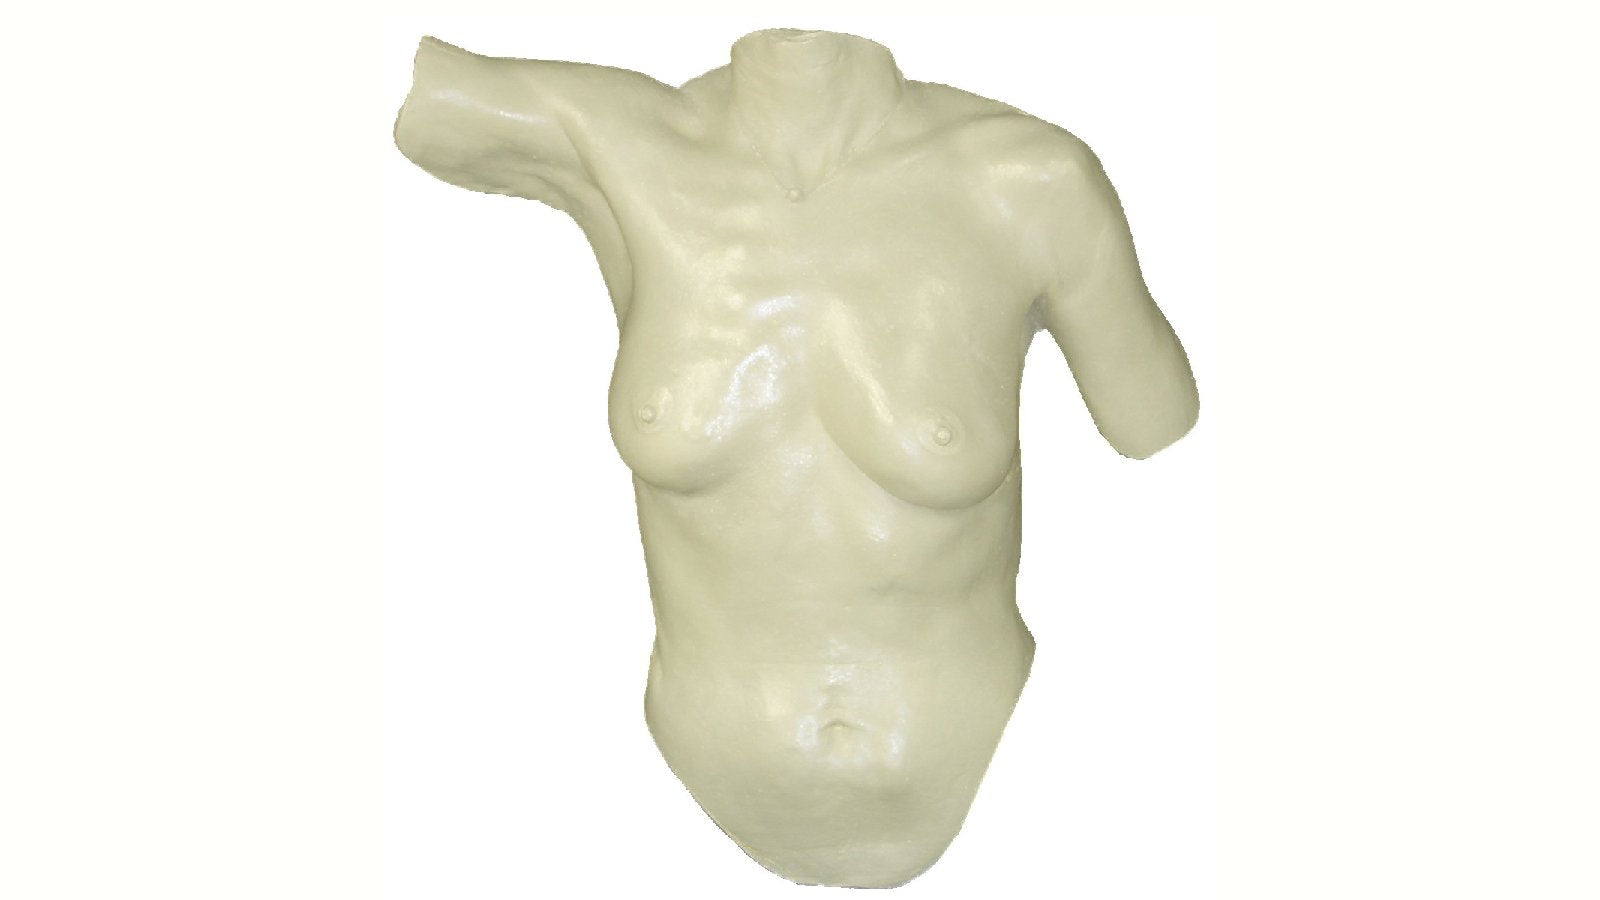
But I was willing to try the technique on my next life cast torso to prove the results were worthwhile. That didn’t take very long either, as soon afterwards, two sisters called to commission two torso castings of themselves.
After I finished Angela’s torso, I reread the text which was a translation from scribe Latin. It cautioned that before any application, the plaster surface needed to be totally dry. I put the torso casting aside for a week to do just that and then swiped a quart of whole milk from the refrigerator and filled a 16-ounce red Dixie cup.
Using an inexpensive chip brush, I followed the instructions and gave the surface a thorough coating of milk. I waited about twenty minutes for the first coat to soak in and then applied a second coat of milk. The instructions indicated to continue applying coats of milk, allowing each coat to dry before the next, until the milk was no longer absorbed by the plaster surface. In my case, it took six coats before I saw that the milk finally bead up telling me it was no longer soaking in.
I left the plaster torso cast to dry overnight. When I returned to the studio the next day, Angela’s torso was glowing as if a light was shining through it from behind. Amazingly, it gave the appearance of sculpted white Carrera marble. The picture above demonstrates the soft glow. (It is far better in person though).
The milk paint finishing technique is well over 400 years old, yet it as fresh and modern looking as any finishing technique available to we artists today—only cheaper. Where else can you quench your thirst from the same container you are finishing your plaster casts?

Leave a comment