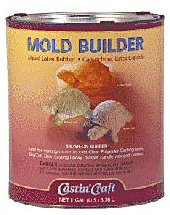
Mold Builder Liquid Latex
LP100101R
| MOLD BUILDER - Liquid Latex Rubber | |
| Now you can duplicate figurines, sculptures and other items with safe, brushable latex rubber. Mold Builder will not stick to metal, clay, ceramics, plaster, wood or plasticine clay. Mold Builder molds are durable, reusable, and economical to make. The molds you make from Mold Builder can be used to make secondary molds of life castings, cast paper, plaster, candle wax, craft soap and casting resins. | |
|
QUICK DRYING, FAST BUILD UP, ECONOMICAL TO USE, PEELS EASILY FROM MODEL, FLEXIBLE AND STRETCHABLE, HARMLESS TO MOST SURFACES, REQUIRES NO MOLD RELEASE! Available in three convenient sizes, they are - 16oz. (473ml), 32oz. (946ml) and 1 gallon (3.78L) containers. |
|
| How to make your own rubber mold: | |
| Step #1 |
Although Mold Builder is harmless to most surfaces, always test an inconspicuous area first prior to applying over the entire surface. Next, some models have holes or ?tunnels? that extend completely through the piece. Here, the hole under the puppy?s stomach, has been completely filled with children?s modeling clay. Clay has also been formed around the edge of the base, filling the gap between model and base. |
| Step #2 |
To apply, simply brush the liquid over the surface of the model, then around the base to create a flange. Allow the Mold Builder to air dry or use a hair drier on a warm setting to speed up the drying. Important: the first two coats must be applied as thin as possible. Remove all thick pockets which if left will seal over and not dry out. Once the surface has dried (translucent appearance) you can apply another coat. Allow the combined layers to gradually achieve proper thickness. Example: A 6? life-like figurine requires approximately ten coats. For added firmness and support, apply a layer of cheese cloth or bandage gauze between your last layers. |
| Step #3 |
When your mold is dry, dust it lightly with talc powder, then peel it off of the model. Dust the inside of the mold with talc powder to keep the fresh latex from sticking to itself. Support the mold in a cardboard box (as shown) and pour in the liquid casting material of your choice. |
| Step #4 |
You can make the flat (?blanket? mold as pictured) just as easily as the ?glove? type. The model (usually a ?plaque-like? piece or wall sculpture) is attached to a base, using small dabs of plasticine clay. Again, use plasticine clay to fill the gap around the edge, giving a good, clean edge to the resulting mold. |
| Step #5 |
Apply enough Mold Builder to give a thick ?blanket? of latex (as shown in this cross section). The latex is allowed to dry ?and is trimmed flush with the base. |
| Step #6 |
Retaining sides are added to contain plaster. These sides can be of any rigid material that will hold the plaster as it sets. With a brush apply a light solution of liquid soap and water over the latex ?blanket? mold and allow to dry. This soap solution when dry will act as a mold release allowing the pieces to be separated later. Next pour plaster over the rubber blanket to form a supportive base for the flexible latex Mold Builder. Mother support mold option is to pour sand or kitty litter into a shallow box. Leaving the original piece in your mold, press the mold into the sand or kitty litter to create an impression. Once the impression is made, carefully remove your mold. Pull original from mold, then place mold back into sand or kitty litter. |
| Step #7 |
When the plaster 'support' mold has set up, the sides are removed. The plaster is lifted off, and then the latex mold is peeled from the model. Replace the latex mold into the ?support? mold, and pour in the casting material of your choice. |
|
Do's & Don'ts: |
|