
SUBSCRIBE TO OUR BLOG
Subscribe to get special offers, free giveaways, and once-in-a-lifetime deals.Welcome to the world of perfect resin crafts! Working with resin castings can be tough due to annoying bubbles. Luckily, we have a top-notch solution to make your DIY projects shine - the simple pressure pot.
Many DIY enthusiasts and crafters love using a pressure pot for bubble-free resin pieces. We will reveal how to use a pressure pot to degas resin. Plus, offer tips and tricks for making clear, professional resin work.
Create an image of resin being purified through a pressurized pot, with bubbles escaping from the surface. The resin should seem clear and glossy, with a hint of color. The pressurized pot should be made of metal and have gauge indicating pressure inside. The scene should take place in a well-lit laboratory with clean and modern equipment visible in the background.
Key Takeaways:
- Degassing resin with a pressure pot is key for perfect resin pieces.
- A pressure pot works by applying pressure, making bubbles shrink until they're gone.
- It's quicker and gives clearer results than vacuum degassing.
- Choosing the right pressure pot and following safety measures are important for success.
- With a pressure pot, you can get crystal-clear castings for all kinds of projects.
Why Use a Pressure Pot for Degassing Resin?
Creating resin castings with a flawless finish is essential. But, air bubbles can get trapped, causing imperfections. A pressure pot helps eliminate these bubbles for perfect resin cures.
The pressure pot works by applying pressure on the resin. This pressure makes the bubbles so small, they become invisible. It helps resin cure clear and bubble-free, ideal for arts and crafts.
Using a pressure pot means professional results every time. It's great for making resin jewelry, sculptures, or artwork. This method ensures crystal-clear castings that highlight your work's beauty.
Now, let's see how a pressure pot differs from a vacuum chamber. And why it's often the best choice for resin degassing.
Pressure Pot vs. Vacuum Chamber
When we talk about getting air bubbles out of resin, we mainly use two methods: a pressure pot and a vacuum chamber. Although both are good at removing bubbles, they work in different ways and affect resin curing differently.
**Pressure pots** make the bubbles in the resin small by **compressing** them. The pressurized environment in the pot makes the bubbles tiny, nearly invisible. This helps make the resin clearer and harden faster. So, if you want professional-looking resin castings, a pressure pot is a great choice.
**Vacuum chambers**, however, **pull** the bubbles up to the resin's surface. By lowering the air pressure, the bubbles are drawn out, leaving the resin bubble-free. Vacuum chambers work well, but they're especially good for certain things like **mold making** or using **delicate materials**.
For a clear and engaging comparison of pressure pots and vacuum chambers, see the table below:
|
Method |
Bubble Removal |
Resin Curing |
Applications |
|
Pressure Pot |
Compresses bubbles within the resin |
Faster curing times, clearer castings |
Wide range of resin casting projects |
|
Vacuum Chamber |
Pulls bubbles to the surface of the resin |
Longer curing times |
Mold making, delicate materials |
Choosing between a pressure pot and a vacuum chamber depends on what you need for your project. Pressure pots are best for clear, fast-curing castings. But vacuum chambers are better for specific tasks. Think about your project’s nature and what you want to achieve to make the right choice.
A resin casting being placed into a pressure pot. The pressure pot is filled with gas bubbles that are being released from the casting as the pressure is applied. The casting appears glossy and translucent, with visible air pockets being pushed out. The surroundings should be in focus, but the emphasis is on the casting itself and the pressure pot.
Setting Up a Pressure Pot for Resin Casting
To get bubble-free resin castings, setting up your pressure pot correctly is key. Follow these steps for a smooth setup for your projects.
Clean the Pressure Pot
Before starting, ensure your pressure pot is clean. No debris or residue should be inside. A clean pot helps maintain the right pressure and keeps your resin clean.
Mix the Resin
Check the epoxy resin instructions before mixing. Use a clean container to mix the resin correctly. Doing this ensures your resin mix is top-notch.
Pour the Resin and Prepare the Mold
Choosing a silicone mold is best for resin projects. Pour the resin slowly to avoid extra air bubbles. Make sure the mold is clean to ensure the best result.
Place the Mold Inside the Pressure Pot
After filling the mold with resin, put it carefully in the pressure pot. It should be centered and stable to prevent any shifts during degassing.
Close the Pressure Pot and Connect to an Air Compressor
Seal the pressure pot tightly. Connect it to an air compressor with the right fittings and hoses. This keeps the pressure needed to remove bubbles.
Adjust the Pressure Settings
Look at the resin manufacturer's advice for pressure settings. Then, set your air compressor's pressure to match. This helps in achieving bubble-free results.
Let the Resin Cure
After all is set and the pressure fixed, let the resin cure as suggested by the manufacturer. This step is key for clear, bubble-free castings.
Tips for Effective Resin Degassing
Achieving bubble-free resin castings is crucial. Using a pressure pot enhances clarity and quality in your pieces. Here are essential tips for top results:
- Set the Right Pressure Pot Settings
Each resin type has unique pressure and cure time needs. Adjust the pressure pot according to your resin. Check the manufacturer's recommendations for optimal pressure to ensure good degassing.
- Ensure Proper Sealing
Air leaks can harm the degassing process, leading to flawed castings. Ensure your pressure pot is sealed well before starting. Verify all seals to guarantee a secure, airtight environment for the resin.
- Thoroughly Mix Your Resin
Mixing the resin well before degassing is key. Stir the resin and hardener completely to reduce bubbles. This ensures even distribution throughout the mix.
- Follow Safety Precautions
Working with a pressure pot can be risky. Always wear protective gear, like gloves and safety glasses, and work in a well-ventilated area. Stick to the resin manufacturer's safety tips.
These steps will lead to great results when using a pressure pot for resin. Now, see this table for important settings for different resin types:
|
Resin Type |
Pressure (PSI) |
Curing Time (Hours) |
|
Epoxy Resin |
40-60 |
4-6 |
|
Polyester Resin |
30-50 |
6-8 |
|
25-40 |
2-4 |
With these tips and settings, you're set for successful, bubble-free resin casting. Always adjust based on your resin's needs. Remember, safety and accuracy are vital. Follow these guidelines carefully.

Choosing the Right Pressure Pot for Resin Casting
Selecting the right pressure pot for resin casting is key. A pressure pot helps achieve the best results by removing bubbles. This makes resin castings clear and flawless. Keep some factors in mind while choosing:
Size
Think about the size of the pressure pot you need. A larger pot is better for big molds or working with many at once. But a smaller pot is good for small projects.
Maximum Pressure Capacity
Look at the maximum pressure the pot can handle. Different resins need different pressures to remove bubbles. Make sure your pot can reach the pressure you need for perfect results.
Ease of Use
How easy it is to use the pot matters. Check for features like clear gauges, easy controls, and simple interfaces. These make the process smoother.
Pressure Pot Modifications
Some pots might need changes to fit your resin casting needs or molds. Choose a pot that’s easy to modify or already fits your needs.
Compatibility with Air Compressor
Ensure the pot works with your air compressor. They should connect without issues for smooth operation.
Research well and read reviews before deciding. Think about what your projects need. Pick a pot that meets these needs within your budget.
|
Key Factors |
Description |
|
Size |
Determine the appropriate size based on your casting projects. |
|
Maximum Pressure Capacity |
Ensure the pot can generate enough pressure for bubble removal. |
|
Ease of Use |
Look for user-friendly features for a smooth and efficient resin casting process. |
|
Pressure Pot Modifications |
Check for compatibility with specific resin casting techniques or silicone molds. |
|
Compatibility with Air Compressor |
Ensure the pot and compressor have compatible fittings and connections. |
Choosing the right pressure pot makes a big difference. It ensures you get excellent results and beautiful resin crafts easily.
For more information on choosing between pressure casting and vacuum casting, visit this informative blog post:
Common Issues and Troubleshooting
Using a pressure pot helps reduce bubbles in resin castings, but it's not always perfect. Most issues can be fixed easily. Here's how to troubleshoot common problems:
- Uneven Curing
Uneven curing happens when resin thickness or temperature varies. This can make some areas cure too fast or slow, changing the final look. Here's what you can do:
- Mix the resin well and use the right resin-to-hardener ratio as the manufacturer says.
- When pouring the resin, make sure it's even. Avoid having thick or thin areas.
- Put the mold in the pressure pot carefully so it sits flat.
- Set the pot according to what the resin maker suggests.
- Air Leaks
Air leaks lessen the pressure pot's ability to remove bubbles. To fix air leaks, do the following:
- Look over the pot for damage or wear like cracks or loose parts.
- Before you pressurize the pot, ensure the lid is properly sealed.
- Check every connection, like the air hose and valve, for leaks or loose fittings.
- If you find any bad seals or gaskets, replace them to stop air leaks.
- Improper Pressure Settings
Using incorrect pressure can lead to not enough bubble removal or can squash your resin. Here's how to adjust pressure:
- Follow the resin maker's advice for setting the pressure.
- Begin with a lower pressure, then increase as needed, watching the resin closely.
- Try various pressures and resin mixes to best remove bubbles without ruining the resin.
If you still have issues with your resin casting, getting guidance from skilled resin artists or instructions from the resin maker can help. Figuring out what works may take some experimenting, as different projects and resins have special needs.
For better resin casting results, here are some tips on using the pressure degassing process to make clearer castings.
Enhancing Clarity in Resin Castings through Pressure Degassing
Using a pressure pot for degassing resin helps make castings clearer. It shrinks bubbles, making flaws almost invisible. This is key for projects like resin jewelry or clear pieces. To get crystal-clear castings, follow the right steps and use a good pressure pot.
Create an image of a clear resin casting being degassed in a pressure pot, with bubbles rising to the surface and the pressure gauge reading high. Show the casting suspended in mid-air, with the machinery surrounding it visible in the background. Use a cool color palette to convey a sense of precision and clarity, with the edges of the casting sharp and defined.
The pressure pot makes sure no bubbles spoil the resin's look. This lets the resin's beauty stand out. It's crucial for both detailed jewelry and big art pieces.
It's important to use the right pressure and cure time. Follow the resin's instructions and try different settings. Make sure your setup is sealed well and uses quality molds. This will make your casting clearer.
Pressure degassing makes resin items without bubbles or marks. It works well for artists at any level. A pressure pot can improve your work, making your creative ideas shine with clear beauty.

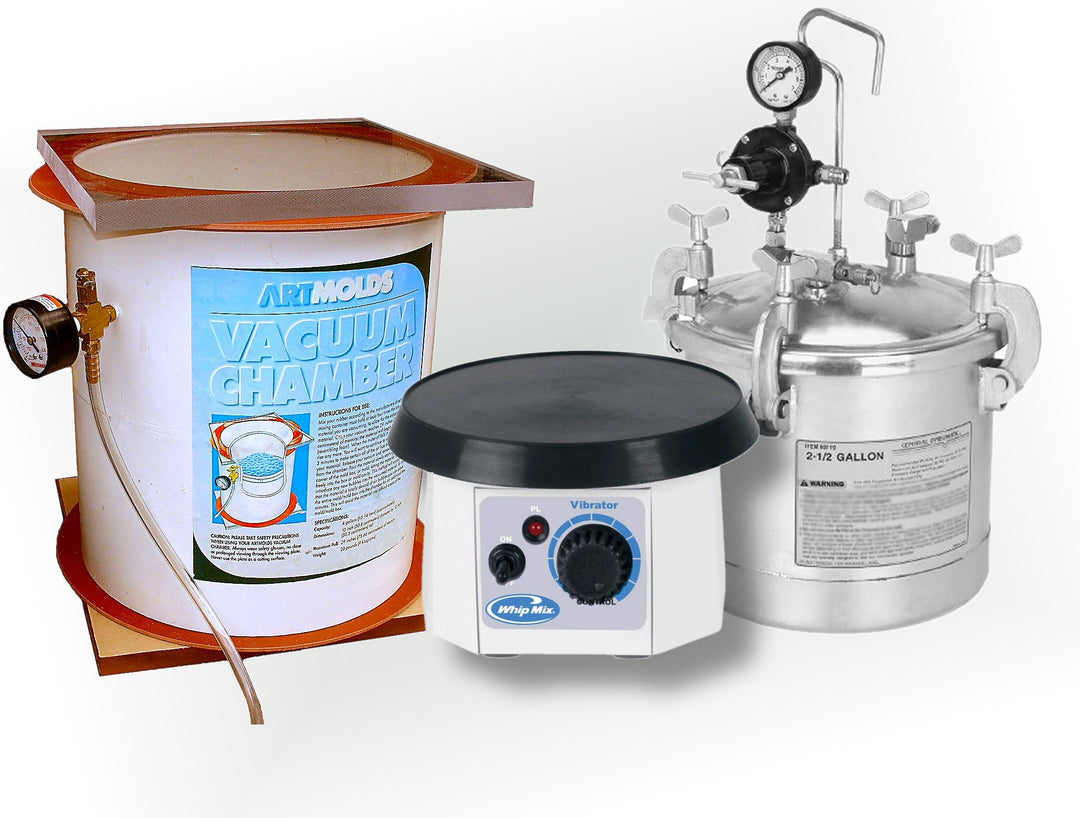
Vacuum Chamber
Safety Tips for Using a Pressure Pot with Resin
Working with resin and a pressure pot requires careful safety measures. To ensure a safe environment and protect yourself, follow these important tips:
- Always wear protective gear:It's key to wear gloves, eye protection, and a respirator when using resin and a pressure pot. These protect you from resin contact and fumes.
- Ensure proper ventilation:Work in a place with good airflow to avoid fume buildup. Open windows or use fans for better air during your work.
- Familiarize yourself with safety guidelines:Read and understand the safety guidelines each resin manufacturer provides. Follow these safety steps carefully before starting projects.
- Clean up spills promptly:Quickly clean any resin spills or leaks. Use the right cleaning materials and dispose of waste properly to prevent accidents.
- Properly dispose of waste materials:Follow local rules for disposing of used resin and other waste. This protects the environment and reduces hazard risks.
By following these tips, your resin casting projects with a pressure pot will be safe and successful.
Recommended Safety Equipment
Here are some key safety items for working with resin:
|
Safety Equipment |
Description |
|
Gloves |
Wear chemical-resistant gloves to avoid resin touching your skin. |
|
Eye Protection |
Protect your eyes from resin with safety goggles or a face shield. |
|
Respirator |
A respirator with the right filters prevents breathing in resin fumes. |
|
Ventilation System |
Keep your work area airy with fans or open windows. |
These safety items add extra protection and peace of mind during resin casting.
Safety is crucial when working with materials that can be risky. With the right precautions and safety gear, you can safely enjoy resin casting.
For more details on pressure pots for resin, visit artmolds.com, your go-to for quality pressure pots and accessories.
Conclusion
A pressure pot is great for getting rid of bubbles in resin. It creates a special pressure space that stops air bubbles. This means you end up with clear, pro-looking resin creations. It's useful for both DIY fans and experts.
Using a pressure pot makes sure your resin pieces look perfect. It shrinks the bubbles so much; you can't see them. When you're making things like resin jewelry or clear art, this is super important for that crystal-clear finish.
To get amazing results, pick the right pressure pot and set it up correctly. Adjust the pressure and make sure it seals well. Being safe and learning best practices lets you make beautiful resin pieces that will wow everyone.
FAQ
Why is degassing resin important for resin castings?
Removing air bubbles is why degassing resin matters. It makes your castings look clear and professional.
How does a pressure pot help with degassing resin?
A pressure pot squashes air bubbles in resin. These smaller bubbles mean your castings will be clear and cure faster.
What is the difference between a pressure pot and a vacuum chamber for degassing resin?
A pressure pot squishes air bubbles. A vacuum chamber pulls them to the surface. Most people like pressure pots for clearer, quicker casts.
How do I set up a pressure pot for resin casting?
Clean the pressure pot first. Mix resin as the maker says. Pour it into a mold.
Put the mold in the pot, seal it, and hook up an air compressor. Set the pressure and let the resin cure.
What are some tips for effective resin degassing with a pressure pot?
Use the right pressure for your resin. Make sure the pot is sealed well to keep air out. Mix the resin well before it goes in the pot. Always be safe.
How do I choose the right pressure pot for resin casting?
Look at size, pressure limit, how easy it is to use, and if it fits your compressor. Read reviews to find a good fit for your budget and needs.
What are some common issues with resin casting and how can they be solved?
You might have uneven curing, air leaks, or wrong pressure. Check the maker's guide, ask experts, and try different settings and mixes.
How does pressure degassing enhance clarity in resin castings?
It makes bubbles smaller so you can't see them. Perfect for clear art and jewelry.
What safety precautions should I take when using a pressure pot with resin?
Wear gloves, eye protection, and a mask. Keep the room airy to avoid fumes. Follow resin safety tips and clean spills right away.
What are the benefits of degassing resin with a pressure pot?
A pressure pot makes castings clear by getting rid of bubbles. It quickens curing and makes resin clearer. Ideal for arts and crafts.

Leave a comment